Topsy Turvy Cake Tutorial 2 - CARVING
LINK TO PROFESSIONAL CAKE FILLING METHOD:
This is part 2 of 4
LINK TO PART 1:
LINK TO PART 3:
LINK TO PART 4:
In this segment, I demonstrate how to carve a topsy turvy cake using the upside down tapering and wedging method.
Find Wicked Goodies:
BLOG /
PINTEREST: /
INSTAGRAM /
FACEBOOK
TWITTER
TRANSCRIPT
Now, begin with a semi-frozen cake. I suggest beginning with one of the middle tiers as the medium size is usually easiest to handle. Once you get the hang of it, you’ll be ready for the smallest and largest tiers, which are more challenging. Here is the cardboard that’s the same size of the cake, which goes on the bottom now but will ultimately be on top. And here’s the cardboard base that will ultimately hold up this cake from the bottom. Because this process happens upside down, the cake is now on its head.
Using a serrated knife, carve the cake on a diagonal starting from the cardboard’s edge, using the two cardboards as guides. Hold the smaller cardboard in place on the top of the cake so it does not slip around. The first stage is to remove the ledge that’s surrounding it. Now because this cake is frozen so it’s harder to cut but the advantage is that you can cut at a very precise angle all around.
Clear off the bulk of the scraps and put them into a bowl.
Once the bulk of that edge is removed, dig in more to straighten out the sides.
Towards the end, run the knife in long sawing motions across the sides of the cake to shave off any last bits that are sticking out.
Again, clear off the scraps and put them into a bowl then seal that bowl with plastic wrap and put it into the refrigerator.
Next, remove the smaller cardboard and push the knife gently just into the top of the cake, right down the middle, to mark the halfway point. Then cut a half moon sliver out of the surface, on a bias. Be very careful of the free hand here. If you are not sure with the knife, wear a cutting glove on that opposite hand.
Once that sliver is removed, flip it around and press it into the mirroring side of the circle to extend the cake on that side. Trim and move around any bits of cake that are needed to make that surface flat. Press the smaller cardboard round into that part of the cake and flip it over so it’s right side up.
Make a mark down the middle of the cake on the same axis that was just made previous. Cut a half moon sliver from the same side of the cake from which it was just cut previous. Build it into the same mirroring side of the cake as well. The results should be a cake tier that is both tapered and wedge-shaped, leaning off to the side. Return the larger cardboard to that side of the cake and wrap it in plastic wrap, still sandwiched between the two cardboards. Put it into the refrigerator and repeat this process on the rest of the cake tiers.
Musical soundtrack is "Modern Jazz Samba" by Kevin MacLeod (incompetech.com)
Licensed under Creative Commons: By Attribution 3.0 License
/
This is part 2 of 4
LINK TO PART 1:
LINK TO PART 3:
LINK TO PART 4:
In this segment, I demonstrate how to carve a topsy turvy cake using the upside down tapering and wedging method.
Find Wicked Goodies:
BLOG /
PINTEREST: /
INSTAGRAM /
TRANSCRIPT
Now, begin with a semi-frozen cake. I suggest beginning with one of the middle tiers as the medium size is usually easiest to handle. Once you get the hang of it, you’ll be ready for the smallest and largest tiers, which are more challenging. Here is the cardboard that’s the same size of the cake, which goes on the bottom now but will ultimately be on top. And here’s the cardboard base that will ultimately hold up this cake from the bottom. Because this process happens upside down, the cake is now on its head.
Using a serrated knife, carve the cake on a diagonal starting from the cardboard’s edge, using the two cardboards as guides. Hold the smaller cardboard in place on the top of the cake so it does not slip around. The first stage is to remove the ledge that’s surrounding it. Now because this cake is frozen so it’s harder to cut but the advantage is that you can cut at a very precise angle all around.
Clear off the bulk of the scraps and put them into a bowl.
Once the bulk of that edge is removed, dig in more to straighten out the sides.
Towards the end, run the knife in long sawing motions across the sides of the cake to shave off any last bits that are sticking out.
Again, clear off the scraps and put them into a bowl then seal that bowl with plastic wrap and put it into the refrigerator.
Next, remove the smaller cardboard and push the knife gently just into the top of the cake, right down the middle, to mark the halfway point. Then cut a half moon sliver out of the surface, on a bias. Be very careful of the free hand here. If you are not sure with the knife, wear a cutting glove on that opposite hand.
Once that sliver is removed, flip it around and press it into the mirroring side of the circle to extend the cake on that side. Trim and move around any bits of cake that are needed to make that surface flat. Press the smaller cardboard round into that part of the cake and flip it over so it’s right side up.
Make a mark down the middle of the cake on the same axis that was just made previous. Cut a half moon sliver from the same side of the cake from which it was just cut previous. Build it into the same mirroring side of the cake as well. The results should be a cake tier that is both tapered and wedge-shaped, leaning off to the side. Return the larger cardboard to that side of the cake and wrap it in plastic wrap, still sandwiched between the two cardboards. Put it into the refrigerator and repeat this process on the rest of the cake tiers.
Musical soundtrack is "Modern Jazz Samba" by Kevin MacLeod (incompetech.com)
Licensed under Creative Commons: By Attribution 3.0 License
/
Recipes
Tart recipes
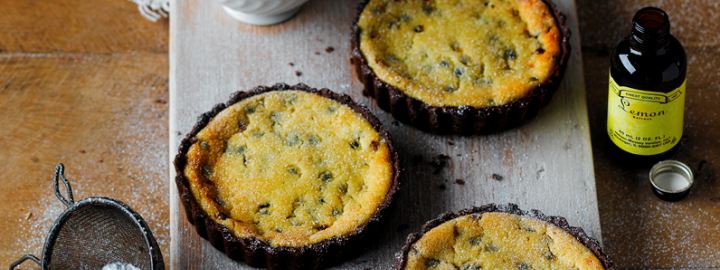
Yorkshire passion fruit curd tart
Cupcake recipes
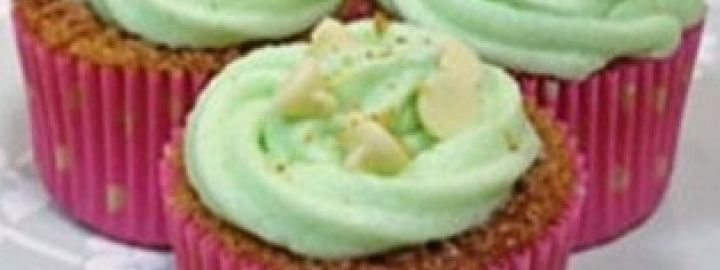
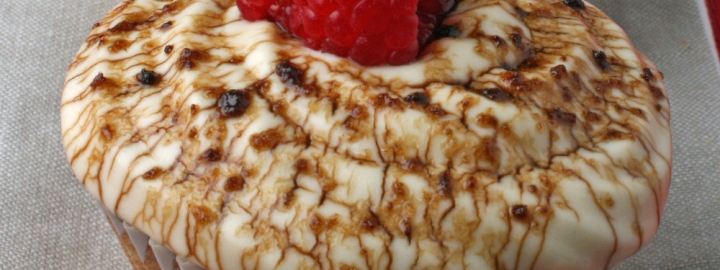
White chocolate and wasabi cupcakes
Tray bake recipes
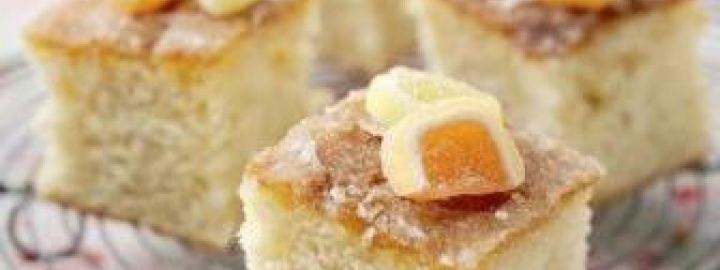
St Clements tray bake
Biscuit recipes
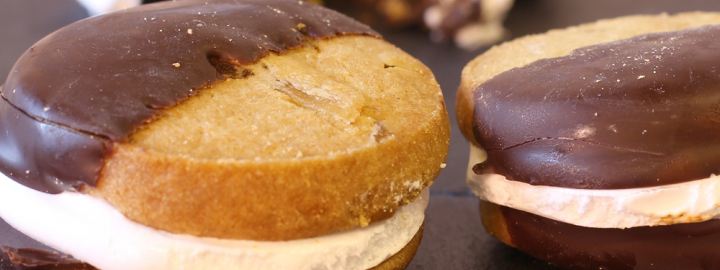
S'Mores
Biscuit recipes
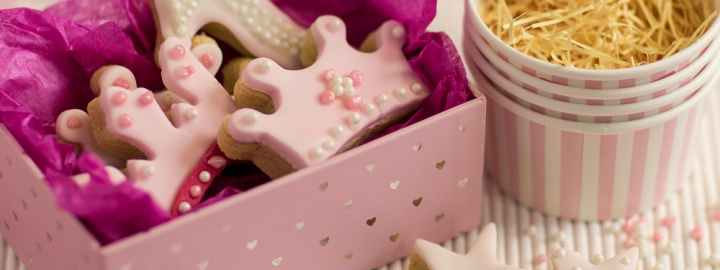
Princess biscuits
Puddings and desserts recipes
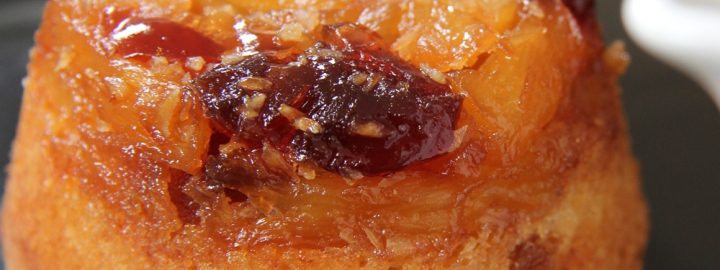
Pineapple upside down cake
Tart recipes
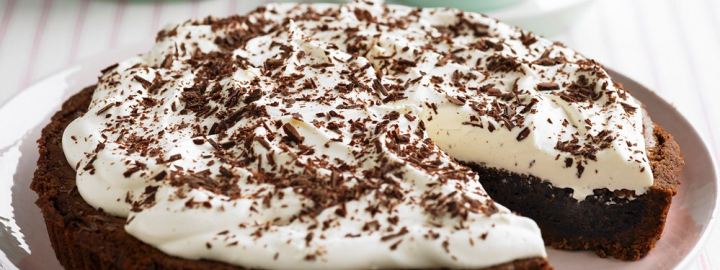
Mississippi mud pie
Cupcake recipes